|
||
|
Wow! Have been at home for about 3 weeks now. I've been able to get some things accomplished. It seems I have other projects that are more important than working on my Hummer. We raise Chickens, Quail, Turkeys, Rabbits and Pheasant. I had to build a new Quail house and a few extra cages. Moved the Chickens from the old Chicken house to the new one. Then my parents came over for a week. There seems to always be something. Well I finished the front
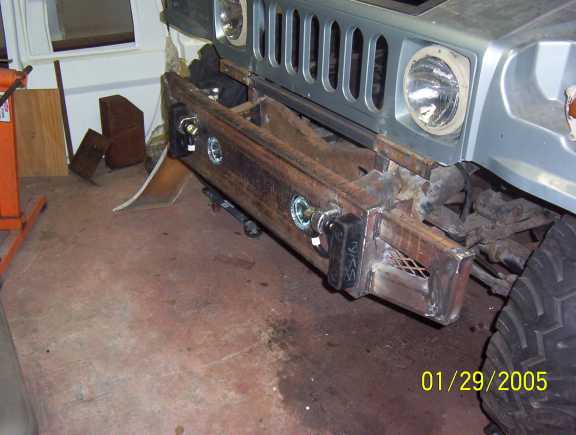
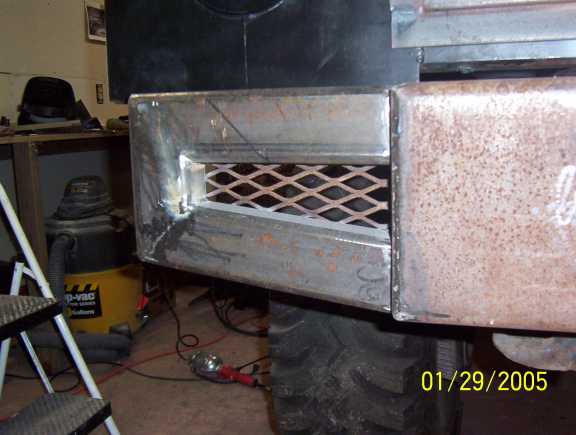
and rear bumper, I think. I really wanted something that was different. I
think I did that. The center section is 1/4 inch channel iron. I added
2x3x1/4 inch tubing. Using a chop saw I angle cut the tubing and welded it
to the channel iron. I angle the tubing back towards the tires by 2
degrees to give it a sweeping effect. I then added 1 inch expanded metal
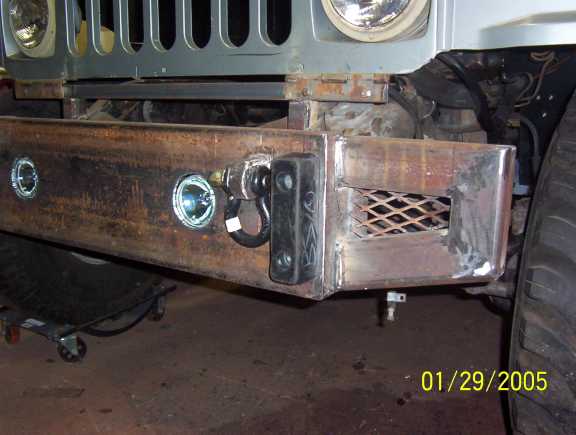
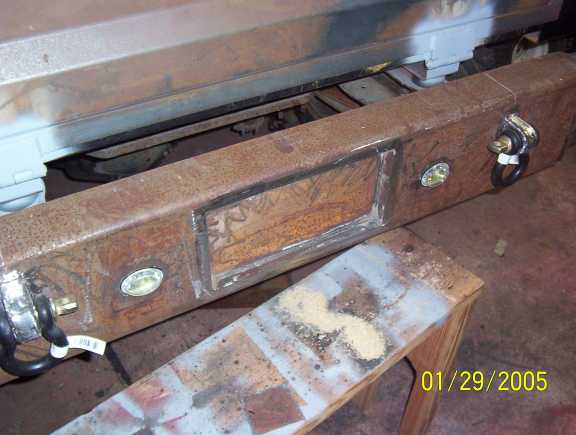
to the back of the sides. I cut out holes for the 4 inch driving lights.
Using some 1/8 inch angle iron about 4 inches long, I welded it tot he
back of the bumper to mount the lights. I still have room for the winch. I
will be using the 4 head roller. Summit racing has the Mile Marker 9000 lb
winch for $449. Should be here next week. This will add another 80 lbs to
the front end. The
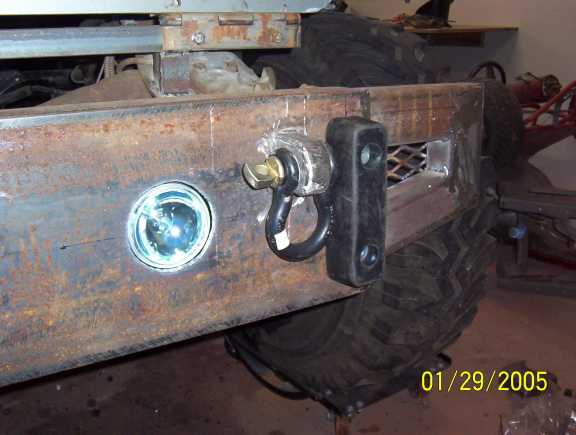
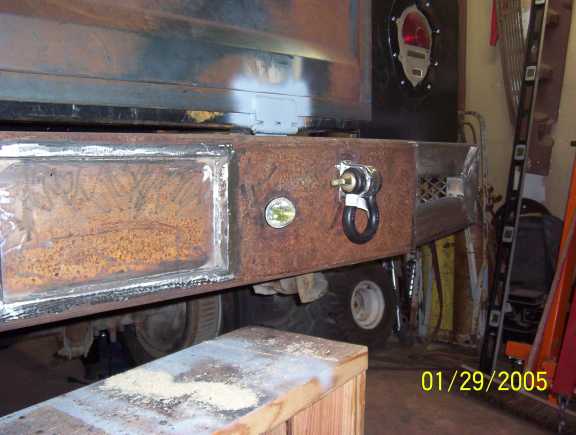
M998 use the 12000 lb. I had the rubber bumpers and drilled holes and
tapped them. The shackles are 3/4 inch that I got from the Tractor Store.
I had some 1/2 inch steel plate so I cut some out for both the front and
back. There
are 2 - 1/2 inch pieces per shackle. I then welded the bracket to the
bumper then used 1/4 inch steel strap to weld over that. Ground everything
down and am now ready for bondo and paint. The
rear bumper was built just like the front. The rear bumper is 9 inches
tall, where the front is 10 inches. This is the bumper that comes from UG.
I cut it the same width as the tail gate. I then welded on the tubing. I
placed the same expanded metal behind this section. I
recessed the tag about 1 inch. This way it doesn't hit the cross member. I
had to cut out a section so that it don't touch. I cut holes for the back
up (driving lights) and installed them like I did the driving lights for
the front bumper. I'll put these lights on a separate switch so that I can
manually turn them on when I want to. If
I can find some more rubber bumpers then I put them on as well. The
shackles were installed the same way the front bumper ones were. I placed
the shackles directly in front of the frame rails. There are tag bolts
that have lights in them for lighting the tag. These will be used. Bumper
is ready for bondo and paint. I spent 2 days doing nothing but welding seams shut. I have only got one or two more sections in the front to weld and I'm done welding. I just didn't want any way for water, wind or critters to get in. Welding took a lot of time due to I didn't want to warp any thing. I would weld a inch or two then move to another section somewhere else. The back window was where I was most concerned. I actually got some warping but it was to the good as it unwrapped a section that already warped. I have started grinding the back half. Tired of grinding I started on the left rear quarter
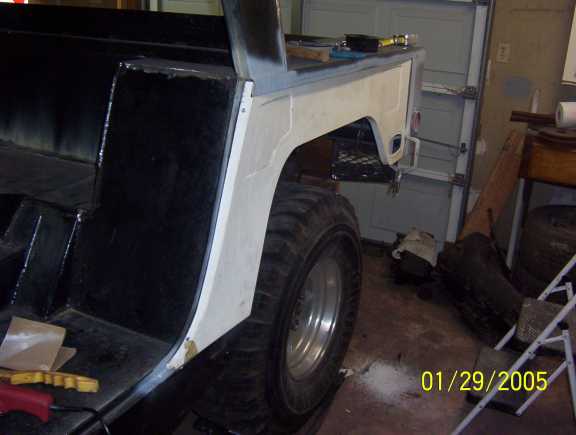
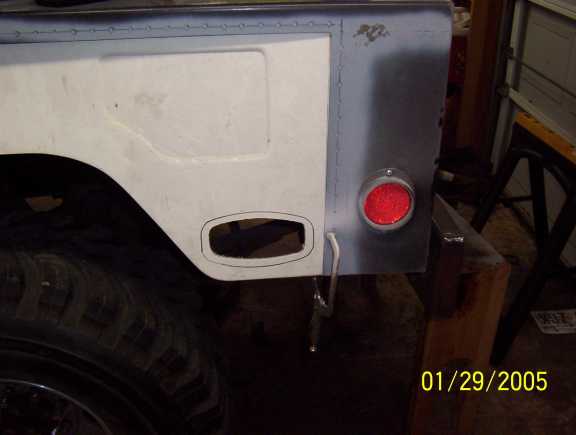
panel. I
needed some way to mount the front of the panel. I welded some 1/8 inch x
3/4 inch strap steel as seen in the picture. This will allow me to rivet
the panel to it. This took about 2 hours to do. The picture doesn't show it but I have all the holes drilled for rivets, installed the marker lights, and need to sand down the sections that touch metal.
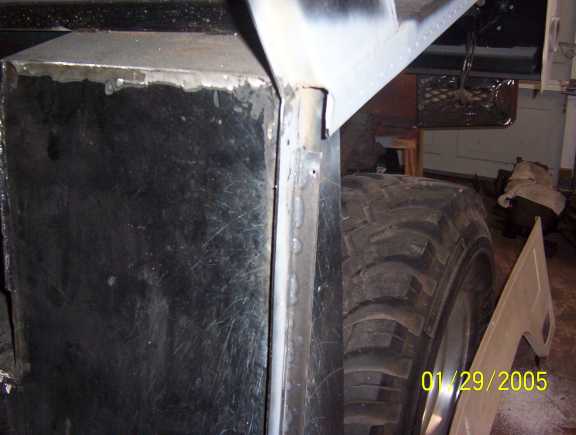
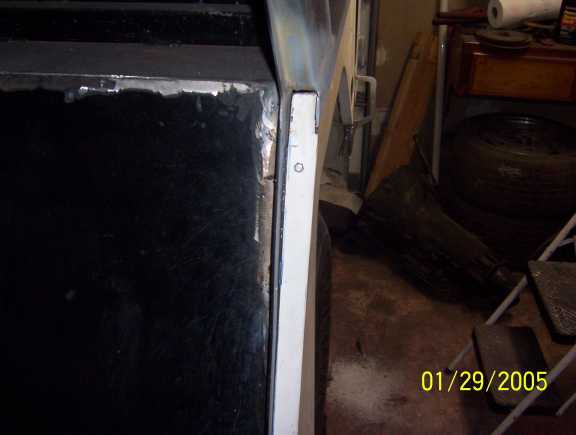
About
a 1/4 inch was under lapped in the back. I guess that it is the kit that I
got but the rear had been added onto where the rivets go. This was welded
from the back. I'll have to grind them down to make sure the panels ride
flush. Also this was a section that had problems. I had to use a cut off
wheel then re-weld the strap that is used to hold the door weather strip.
I have it fixed. | ||